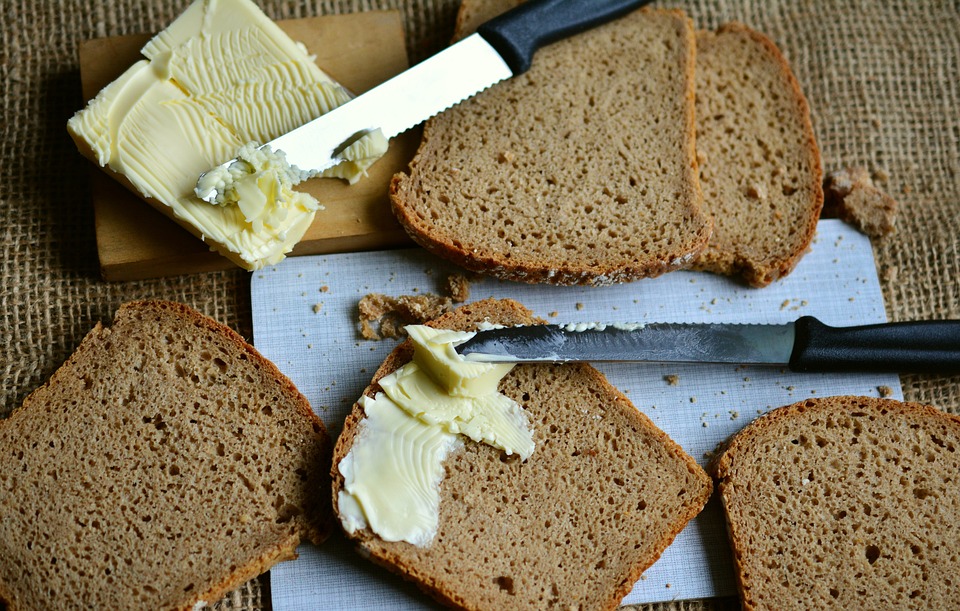
Butter is a dairy product made from the fat and protein found in milk. It’s a staple in many kitchens, used for cooking and baking. While store-bought butter is convenient, it’s also easy to make at home. Homemade butter is a simple process that only requires a few ingredients: milk, cream, salt, and an acidic ingredient like lemon juice or vinegar. The milk and cream are combined and whipped until the butterfat separates from the liquid. The butterfat is then churned until it’s smooth and creamy. The final product is a delicious, homemade butter that’s perfect for spreading on bread, using in recipes, or simply eating on its own.
Overall, creating butter is a great practice. Despite current artisanal trends, the methods for producing butter haven’t altered all that much during the thousands of years that people have been creating it. In fact, producing butter is a really easy process that involves stirring milk until the fat separates from the liquid and clumps together to make butter. So, if you want to do as our forefathers did and learn how to create your own butter, you’ve come to the correct place!
An Overview of Homemade Butter’s History
In short, no one is quite sure who made the initial discovery that shakin’ milk caused butter to develop. It’s possible that this is the case, however, some have theorized that a member of a nomadic tribe may have accidentally thrown a sack of milk over his horse one day and discovered at the conclusion of the trip that solid clumps of butter had developed.
Whoever it was that discovered this delightful discovery, butter has unquestionably played a significant role in history ever since. This relatively unassuming culinary item has fulfilled many more functions than most of us would realize (even as a trademark! ), from soothing sore joints in ancient Rome to bolstering Scandinavian export industries.
Homemade butter is currently enjoying a small renaissance. Making handmade butter is something that many homesteaders love, not just those with a traditional mindset. In fact, even the most firmly established city inhabitants are picking up certain essentials and inventing fresh methods and flavors for making butter! I like to think that this ancient craft is reviving itself given the upsurge in interest!
Do you want to learn how to produce your own butter? If so, you are unquestionably in the proper location. The remaining sections of this article discuss the ideal components for manufacturing homemade butter and detail some tried-and-true methods for doing so. The aim? Of course, to provide you with everything you need to get going on your own!
The Finest Components for Homemade Butter
What components are required to make homemade butter?
You’ll be relieved to learn that you actually don’t need much to start creating butter at home if you’re looking for the simplest homemade butter recipes. In actuality, cream is the only ingredient you truly need.
Everything else that is added to recipes for homemade butter is really only for flavoring and, occasionally, for preservation. A lot of people season their butter with sea salt (both for taste and preservation). Similar to this, more and more artisanal butter producers flavor their products with a variety of herbs and spices, from the usual garlic and herb to the daring orange jalapeo!
The flavor combinations with handmade butter are unlimited. The following are some of the greatest I’ve heard thus far:
- red wine
- salted caramel
- bacon chive
- cilantro lime
- garlic
- roasted red pepper
- tomato garlic
- cinnamon apple
- rosemary olive
- hot chocolate (yes, really!)
Which cream makes the greatest butter?
The best cream to start with, according to experts, is raw milk from Jersey cows. In addition to having the greatest levels of fat in their milk, Jersey cows also have some of the biggest fat globules. As a result, those globules more easily unite and transform into butter. You’re looking for juicy globules and high fat percentages while creating butter, not any of those things.
If you don’t have access to raw Jersey cow milk, heavy cream or whipped cream are the next best options. Again, the key is a high fat percentage. Make careful to read the label and search for milk fat that is at least 40%. Additionally, look for any additives on the label; you should avoid them for a variety of reasons that I can’t get into here. Last but not least, follow our advice and choose the best organic product you can find or afford. You’ll be glad you did because the taste really does reflect the quality!
Can heavy cream be substituted while making homemade butter?
Don’t panic just yet if you can’t get your hands on heavy cream. Although they might often need a lot more work and don’t necessarily taste as good, there are various methods for creating butter at home that do not involve heavy cream. Although it is technically feasible to make butter from pasteurized and homogenized milk, as I describe below, it is unlikely to provide the kind of rich, creamy homemade butter you’re hoping for.
Creating butter from pre-made milk
You may find pasteurized and homogenized milk in the majority of retail establishments nationwide. Heat treatment was used to eradicate bacteria and pathogens in pasteurized milk. The fat globules are broken up into tiny pieces in homogenized milk, which makes it more difficult for them to separate from the liquids. Earlier, I mentioned that the biggest benefit of using Jersey cow milk is that it produces superior butter since the fat globules are larger. Yes, that gives away something about what’s to come.
Store-bought milk does not typically make excellent butter. It is undoubtedly feasible to make butter from store-bought milk (if you have, you probably made it from creamline or cream-top milk, which may have been pasteurized but not homogenized), although the results may be somewhat disappointing when compared to raw milk or heavy cream. Additionally, because store-bought milks often contain less than 3.5% fat compared to 40% or greater in heavy cream or raw milk, you tend to get far less butter from the same amount of these milks.
In order to make one stick of handmade butter, how much cream is required?
One stick of handmade butter will typically require two cups of cream to prepare. One stick weighs about 113g (4 oz), or about half a (US) cup. Of course, this measurement is not exact. The amount of fat in your cream and, to some extent, the technique you use to make the butter will determine a lot of things. However, that ratio ought to serve as a general guide. Since measuring your butter in sticks or cups, for example, makes it difficult to create exact ratios, the following conversion table should be able to assist you. Try an experiment if everything else fails!
| BUTTER STICKS | US CUPS | GRAMS | OUNCES | CREAM NEEDED |
| 0.5 stick | 1 /4 cup | 56.7g | 2oz | 1 cup |
| 1 stick | 1/2 cup | 113.4g | 4oz | 2 cups |
| 2 sticks | 1 cup | 226.8g | 8oz | 4 cups |
| 4 sticks | 2 cups | 453.6g | 16oz | 8 cups |
Practical Methods for Making Butter
It’s time to start producing your very own homemade butter after you have your raw milk or heavy cream and any additional flavorings you wish to add! The approach you use will primarily depend on the tools you have, the amount of money you plan to generate, and how much elbow grease you are willing to put in. You can use the most basic way, which involves shaking the cream in a jar, or you can choose more complex techniques that require electric churners and a variety of other tools to keep you on track.
What tools are needed to create homemade butter?
For thousands of years, people have been manufacturing butter at home. You won’t be shocked to learn that you don’t actually need that much gear as a result! But in the present era, machinery has made making butter much (much!) simpler.
You could easily get away with using only a glass jar if you’re only planning to create a small amount of butter every now and then. You might think about investing in more advanced churning equipment if you want to manufacture batches of butter frequently for your family or, even better, if you plan to make butter to sell on your homestead.
After you’ve actually prepared the butter, you’ll need to consider how you’ll serve and store it. There are numerous solutions for this as well. In the section that follows, I’ve mentioned a few of our preferred techniques.
Let’s focus on getting that fat to cluster together for the time being (doesn’t that sound wonderful?)
The two primary techniques for producing homemade butter
Making butter in a jar using method 1
This approach is delightfully easy. Simply place your cream in a container and spin it vigorously until butter appears.
To reduce the chance of leakage while using this method, it is advisable to use a jar with a disc lid and screw rim. You most likely already have one of these lids sitting around because they are common to mason jars. If not, you can use a conventional screw-top jar; however, before you begin shaking, make sure the lid is tightly screwed on.
Simply fill the jar halfway with cream and shake it violently from top to bottom to make homemade butter in a jar. Going top to bottom enables the milk to move through the container more completely. Continue until a ball of butter starts to take shape. This could take a while, probably 10 minutes or more (more if you are shaking a larger quantity). Keep in mind that your objective is to separate the fat from the liquids, so make an effort to shake, shake, shake until butter starts to form!
It’s ideal to incorporate flavors into butter from the beginning of the process. You are more likely to have an even dispersion of taste because the cream is still runny.
The fat will start to clump together after a few minutes of shaking. It should be thudding against the lid and splashing around in the jar. This indicates that your butter is beginning to develop. You should now gather your strength and continue shaking the jar until you notice a solid ball of butter inside.
You’ll also notice that there are liquids in the jar’s bottom once the ball has formed. It’s buttermilk here! The buttermilk can be removed from the butter ball and used straight away in another recipe, or it can be refrigerated for up to a week and kept in the jar for later use.
If you prefer your butter to be free of buttermilk, scoop out the ball and rub it in your hands under a cold faucet to rinse it out since not all of the buttermilk will come out while the jar is still shaking. Regardless of your particular preferences, doing this is usually a good idea because it will prevent the butter from spoiling if you plan to store it for later use.
That’s all, then! You just made homemade butter in a jar, congrats!
Technique 2: Churning butter
You’ll probably prefer the churn approach if shaking a jar till your arm muscles are burning doesn’t sound like much fun to you.
There are many different sizes and types of butter churns. You may purchase glass jars with built-in butter churns for small batches. These typically come in half-pint, pint, or quart sizes and have a special handle on the top of the lid that you crank to stir the cream with little paddles inside the jar.
A more conventional stoneware churn with wooden dashers that are dipped into it to stir the cream is required for larger amounts. These typically come in two or three gallon sizes, but as many of these churns are handmade, different sizes may be available.
The basic ideas behind creating butter in a jar apply here in a similar manner. Simply continue swirling, churning, or otherwise agitating the cream until the fat separates from the liquid. Again, it could be a good idea to add flavors at the beginning of the process to allow for an even distribution as you churn. However, depending on the procedure you choose, certain recipes may call for the addition of extra components at the very end.
Can butter be over-churned?
Knowing whether you can overchurn butter is crucial if you want to use a butter churn. It’s difficult to damage butter because the process is so straightforward, but I’ve heard of cases where it has happened. Overworking butter may cause it to sort of melt and revert to looking somewhat like whipped cream.
Much depends on how long you’ve actually been churning for and whether you still have buttermilk in your jar or churn (along with environmental conditions like it being hot and your butter melting before you can scoop it out properly). Try to come up with a different use for your butter if you find yourself in a situation where you believe it has “spoiled” for the purpose for which it was purchased. Many people fry or bake with “over churned” butter. It still has amazing flavor!
Why is butter cultured?
If you’ve ever visited Vermont, upstate New York, or any other part of New England, for that matter, you’ve probably seen one of the many creameries in the area promoting “cultured butter.” I’ve noticed it elsewhere as well, but New England seems to be where I’ve seen it the most frequently.
When making cultured butter, cream is combined with bacterial cultures and allowed to ferment before being churned. As a result, the final butter has a tangier flavor and resembles some European butters more so than American sweet-cream varieties. The resultant flavors are stronger the longer the mixture is allowed to ferment, just like with other fermented foods like yoghurt and wines. Naturally, this is a very scientific process, and creameries all over the world protect their recipes and procedures as trade secrets.
You can manufacture cultured butter at home if you’re up for it! It only requires adding a cultured product to the cream and allowing it to ferment before stirring the butter (shaking or churning, whatever your preference). At the end of this post, you’ll find our favorite recipe for making cultured butter.
How to Keep Homemade Butter Fresh
You are more stronger-willed than I am if you haven’t found a way to consume your own butter right away after creating it! In this situation, you will need a way to protect and store your delectable creation.
Butter that has salt added to it will naturally work as a preservative. When creating butter, salt holds onto moisture, preventing your butter from drying out as rapidly. If you’ve added salt, homemade butter should last for around 3-5 days in your kitchen before it starts to go bad (depending on the temperature of the room).
However, the best method for storing butter is refrigeration. In the refrigerator, many homemade salted butters can last for several months and unsalted butters for several weeks. There is no guarantee with this product, as there is with all handcrafted goods, so some trial and error may be required.
Again, you have a variety of storage options. There’s no reason a regular tupperware won’t work if you’re storing a little amount of butter for a few days. However, if you want something a little more interesting, think about using butter paddles or molds to make it look lovely, and then keep your masterpiece in a glass butter dish, a butter boat, or a butter crock. Each serves a slightly different purpose, but a lot will depend on your preferences. (By the way, see this post if you’re interested in finding out how to use butter molds effectively.) But the plain parchment paper is an even easier answer. Butter should be wrapped in one or two layers and sealed to keep out air.
How long may homemade butter be left out on the countertop?
There are a few things you should know about leaving butter out at room temperature if you don’t intend to refrigerate it.
First off, because every area has a distinct temperature, it’s frequently difficult for others to forecast how long the butter would stay. The first few times you prepare it, you’ll need to keep a close eye on it to get a decent idea of how long it will survive without spoiling (either drying out or melting and re-solidifying such that the delicious creamy consistency is broken down).
Second, to take into account changes in room temperature, you’ll need to continue testing it over the course of a day or so. Using a knife to carefully cut into the butter will allow you to determine the quality of the product. The butter should be tender and easy to cut through, but as you do, the remaining portions of the pat should maintain their shape and not’squish’ or otherwise lose their overall shape (by bending down where the knife is, for example). You can probably leave the butter out at that temperature if you can cut into it without losing its form. If not, you ought to possibly consider cooling it.
The Best Advice for Making Butter at Home
If you’re using raw milk, let it sit in something cold (a refrigerator, cooler, the outside, anything works!) for the night. The next morning, skim the cream from the top and use it to make butter.
If you want your completed product to have a sharper, more European taste, that thing is like gold.
Before you begin to churn the cream, let it rest out and reach room temperature. At all costs, avoid using a microwave because it affects the cream’s consistency.
To acquire a more firm consistency and remove extra buttermilk, thoroughly rinse your butter under a cool faucet. If you have cheesecloth, you may also place the butter ball inside of it and, if you’d prefer, knead it in a bowl of icy water to remove the buttermilk. To get all the buttermilk out of a dish, you might need to replace the water several times.
Never discard the buttermilk! The leftover product itself is a desired ingredient. It can be used in a variety of dishes, including salad dressings, dessert creams, and mac ‘n’ cheese and pancakes! (This buttermilk will function similarly to regular buttermilk purchased from a shop if you created cultured butter. To guarantee that uncultured butter reacts with baking soda correctly, you must add an acid, such as lemon juice.
Use butter paddles if you’re making small butter pats to prevent cracks from appearing in the sides, which could cause your butter to dry out more quickly.
Have You Made Homemade Butter Successfully?
If you have, I would love to hear from you! What is your best advice? Let me know your favorite ingredients, techniques, and flavor combinations in the comments below!